This a step-by-step tutorial on how to activate the full translation capabilities on your blog. This might look like a complex process, but bare with me – once setup it is easy to use and I will guide you as much as possible through the process. If anything is not working or you would like further assistance, feel free to contact us.
Step 1: Activate the xili-language plugin
The plugin that provides the translation features is called xili-language. You should be able to find it on the right hand side of your adminsiation dashboard under Posts > Plugins. Go there and search for xili-language in the list of plugins. (1)

Go ahead and activate the plugin (2).
Step 2: Configure xili
Now we need to configure the plugin to the needs of your blog. The bottom item on the navigation bar on your right should now have a new item. Go to Settings > Language (c) xili. You should then see this on your screen:

This is the most important screen in the settings. Here you can add and change the languages available on your blog (1). Each language has a name and a slug (2) associated with it. We go over the details of adding a new language now (3).
Adding a new language
Adding a new language is simple, but has some pitfalls. Find the following form in your main settings page for the xili language plugin:

To add a new language select it from the drop down menu (1). There are only two fields that you might want to change. The full name (2) defines what appears in your menus. Maybe you want to change that to the native language? This is optional though.
The second information is the slug (3). It defines what is added to the urls in your blog when the user is browsing a specific language (e.g. blogs.magicjudges.org/awesomeblog?lang=fr). By default xili makes this a pair of country and language. We don’t like that but rather have it a single ISO code. Unfortunatly you have to change this manually. Delete the country (uppercase part including the underscore) from the slug. In the screenshot above, it would be only sv.
Additional configuration
There are a lot of other settings, but most of them are not that relevant. There is one setting though I do recommend to change:

Change to the tab Language front-end settings (1) and make sure that the Modify home query option is enabled. This ensures that the main blog only shows posts of the current language. While you are at it, you can also define the default language of the blog (option just above).
Step 3: Add ‘language switchers’
The main setup is completed. The last step before blogging is to add the pretty flags to your blog. Go to the following screen:

You can find it under Appearance > Menus (1). You might already have existing menus. Regardless of that, now create a new menu (2) and give it a fancy name (3). Click on create Menu (4).
Now you have some choices to make.

First select which type of menu you want (1). I recommend Nav Menu Singular (w/o current language and if exists). This means, the current language is not displayed as a flag (e.g. if I already see a post in English, the English language is not a current option) and it only shows languages which actually have a translation. This allows you to have a partially translated blog. Once selected, add it to the Menu (2).
The second choice is where you would like to display the language menu (3). If you have many translations, then you select “Language Navigation”. It adds a global navigation menu visible at all times. If only some of your posts are translated, select “Language Navigation Single”. Then the menu only shows up when there is actually a translation for the current page.
Lastly, save the menu (4).
Step 4: Blog internationally!
Now the setup is completed and you can actually start blogging. The most important change: Posts that have no language selected, will no longer show up in your blog! Yes, this most likely means all your previous blog posts are currently not visible. You need to select them as English.
In the list of your posts you have now a new column:

You see which posts have no language at all (1). Those will not show up. You see posts that have a language, but no translation (2). You can also filter through the posts (3).
On each post you have additional options:
 Make sure at least one language is selected (1). If for some reason you want to change a post back to no language, you can do so as well (2).
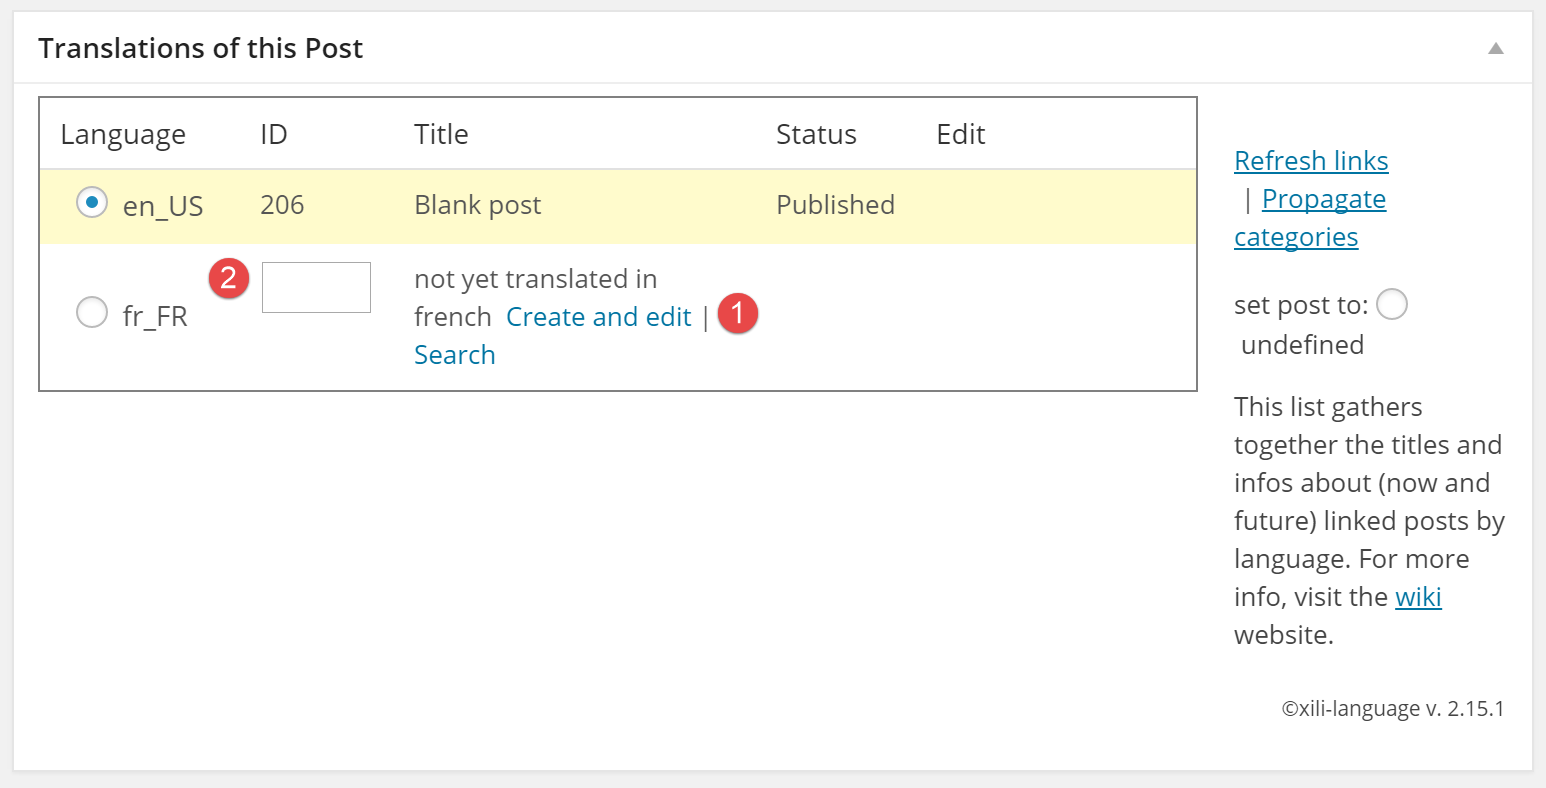
Once a language has been selected the screen looks as follows:

Now you can finally directly create a new translation for a post by clicking on the corresponding link (1). If you want to manually link a existing post as a translation to this post, you add its id to the field (2). You can see the id of a post in its url when editing it (e.g. http://blogs.magicjudges.org/help/wp-admin/post.php?post=292).
Conclusion
I hope this clarified the basic steps of rolling out translation features on your blog. There are many little things one can configure or change, so feel free to experiment or ask for help if necessary.